Allow WP Safer in Wordfence, Solid Security, Jetpack and other security plugins
The one-click button on the WP Safer screen in wp-admin, which plugins it knows, what undoing it really does, and the manual steps for every other security plugin.
A security plugin on your site can block our server without telling anyone. The site keeps working for visitors, and only the connection to your dashboard dies. This article covers the security plugins that run inside WordPress; for the layers in front of it see Allow WP Safer in Cloudflare, Sucuri and a hosting firewall.
The address to allow is always the same one: 65.21.186.173. Add nothing else.
The one-click way
If the site already has the WP Safer plugin on version 1.4.5 or newer, you do not have to hunt through anyone’s settings.
- Open
wp-adminon the site and go to WP Safer. - Find the Security plugin on this site card. It lists only the security plugins actually installed here, each with allowed or not allowed yet beside it.
- Press Allow WP Safer next to the one you want.
If that card is not there, the site is running an older version of the plugin. Plugins → Installed Plugins on the site shows which version it is on. You can use the manual route below instead; it has exactly the same effect.
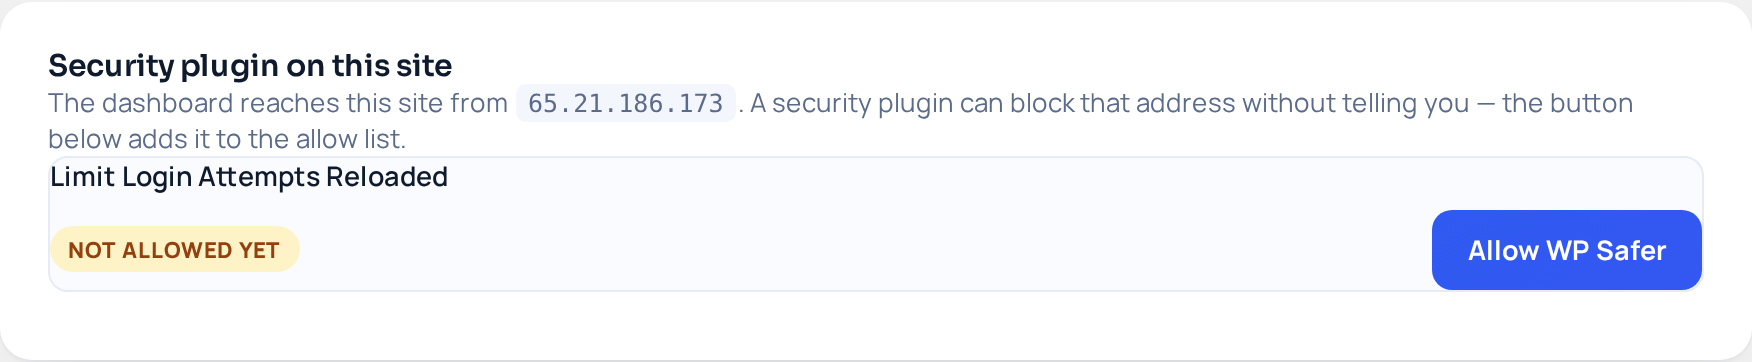
Nothing is allowed until you press that button. We do not add ourselves to anyone’s allow list automatically, and there is no equivalent button in the dashboard — on a blocked site the dashboard cannot reach you anyway, while wp-admin still opens.
Which plugins the button knows
- Wordfence
- Jetpack — both the firewall and the brute-force protection, listed separately
- Solid Security (formerly iThemes Security)
- Limit Login Attempts Reloaded
For Solid Security, Limit Login Attempts Reloaded and Jetpack’s brute-force protection, nothing is written into their settings. The permission is kept by the WP Safer plugin itself, which hands our address to the other plugin at the moment that plugin decides whether to block a request. Open their settings afterwards and you will find them exactly as you left them.
Wordfence and the Jetpack firewall are different: the address really is written into their own list. Those two filter requests before WordPress is fully loaded, so there is no moment for us to answer a question on their behalf.
Undoing it
The same card shows Undo once a provider is allowed. For the three that need nothing written, permission disappears the instant you press it. For the Jetpack firewall the entry is removed from its list, and any addresses you added yourself are left alone.
Wordfence is the exception: it has no public way to remove an allowlisted address, so pressing Undo means we stop adding it again, but you have to delete the existing entry by hand under Wordfence → Firewall → Blocking → Allowlisted Services.
Doing it by hand
You need the manual route in two situations: the site is blocked so hard that the plugin was never installed, or the security plugin is not one of the four above.
The steps below cover Wordfence and Jetpack — the two that write into a list of their own. For Solid Security, Limit Login Attempts Reloaded and Jetpack’s brute-force protection the button is the supported route, because there we answer for you rather than store anything; if you want a permanent entry there too, add our address to that plugin’s own allow list under whatever name it uses.
Wordfence
- Open
wp-adminon the site. - Go to Wordfence → Firewall → Blocking → Allowlisted Services.
- Add
65.21.186.173under Allowlisted IP addresses. - Save, then add the site again in your dashboard or press Check again.
Jetpack
- Open
wp-adminon the site. - Go to Jetpack → Protect → Firewall.
- Add
65.21.186.173under Trusted IPs and make sure the list is turned on. - Save, then press Check again in your dashboard.
Other security plugins
Plugins such as NinjaFirewall, WP Cerber and All In One WP Security are not covered by the button, but they all have an allow list of their own — usually under a name like whitelist, trusted IPs or allowlisted addresses. Add the same address there. If you are not sure which plugin is doing the blocking, look for our user agent, WPSafer/1.0 (+https://wpsafer.com), in the plugin’s own block log.
Checking that it worked
The System check list on the WP Safer screen has a Security plugin allow-list row. It says waiting for you while a detected plugin has not been allowed yet, and in place once it has, listing which plugins are letting us through.
Then go back to your dashboard, open the site and press Check again on the Details tab. A site that was marked inactive after a failed check does not retry on its own — that button is what puts it back in the hourly round.
If the plugin had already blocked us, allowing the address may not clear the block that is already recorded. In Wordfence, check Firewall → Blocking for an entry holding 65.21.186.173 and remove it there as well.
One warning about allow lists
An allowlisted address usually skips every check the security plugin performs, including login protection. That is why we only ever give you one address to add, and why we never ask you to allow a range. If you find a wider block on an allow list somewhere, it did not come from us.